



1. Electrical Installation Standards
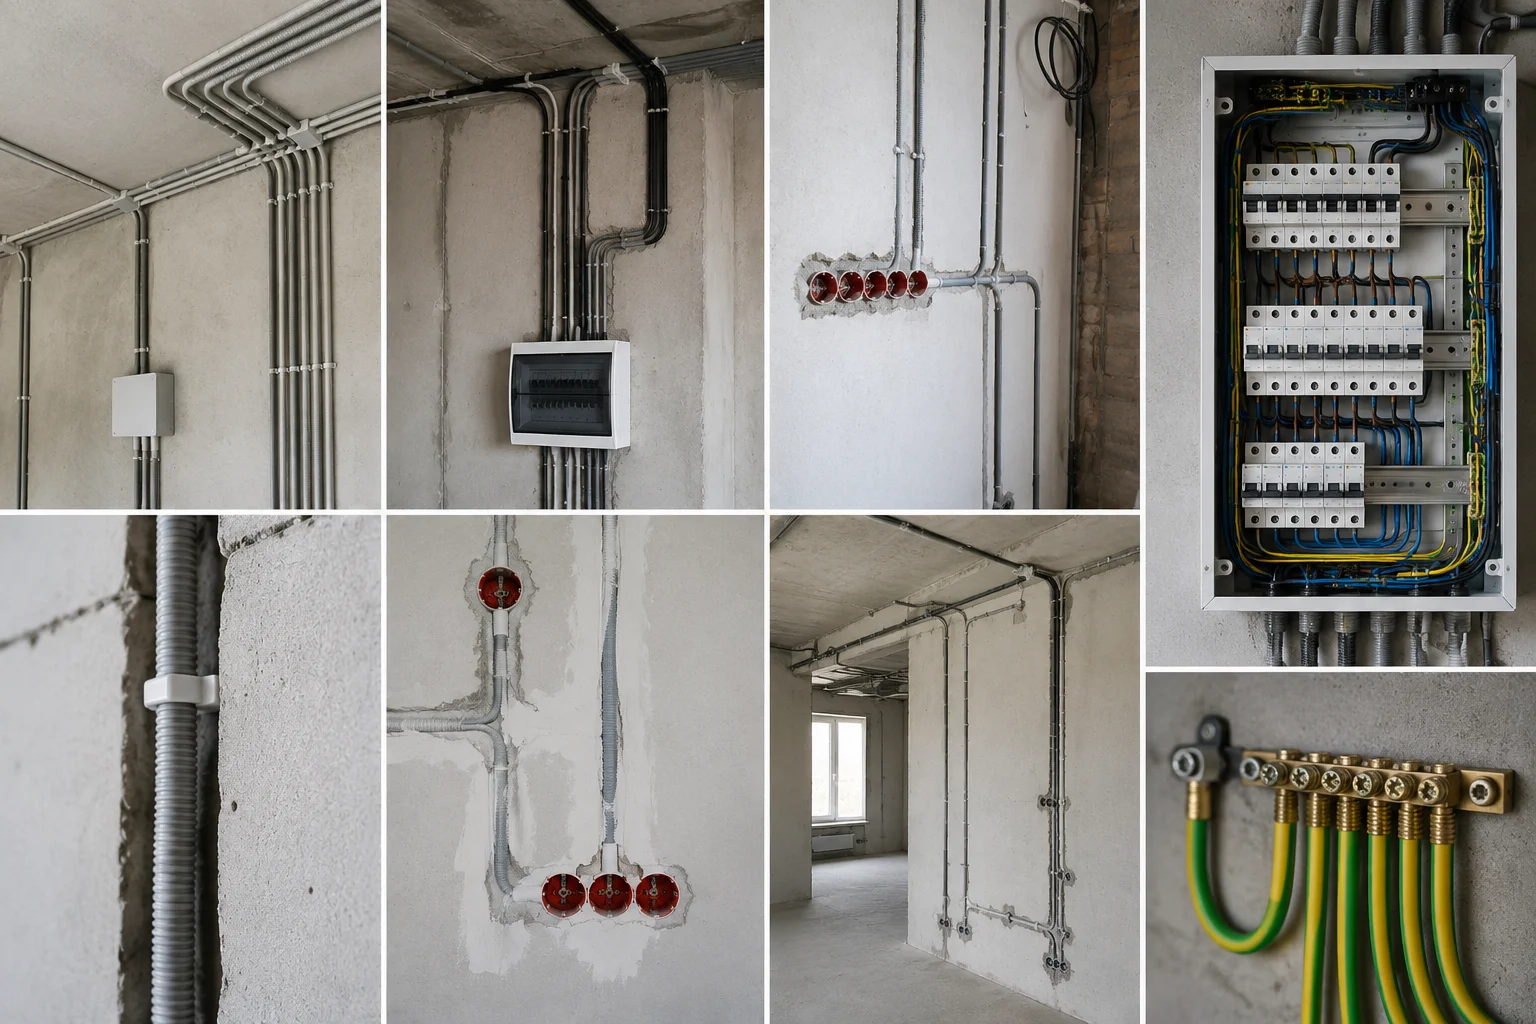
Electrical installation is one of the most important stages of any renovation project. Properly installed electrical systems ensure safety, reduce the risk of fire, and make future equipment installation and maintenance much easier. All electrical work should be carried out according to a professionally prepared project and current construction standards.
1.1 Basic Electrical Installation Standards
- All electrical cables must be installed inside protective conduits.
- Cables should only run horizontally or vertically.
- Power cables and internet cables must not be installed in the same conduit.
- High-power appliances (oven, air conditioner, water heater) should have dedicated electrical circuits.
- Each electrical circuit must have its own circuit breaker.
- A proper grounding system is essential.
- RCD (Residual Current Device) protection is recommended for wet areas.
- Junction boxes should remain easily accessible.
- The number and location of outlets and switches should be planned in advance.
- The entire electrical system must be fully tested before closing the walls.
1.2 Most Common Electrical Installation Mistakes
- Installing cables without protective conduits.
- Running cables diagonally through walls.
- Connecting too many outlets and devices to a single circuit breaker.
- Ignoring the grounding system.
- Installing too few outlets and switches.
1.3 Datvale.ge Recommendation
Before starting electrical work, use the Renovation Calculator to estimate the project scope and budget. If you plan to upgrade your lighting during the renovation, explore New Light's lighting collection, featuring modern lighting solutions for residential and commercial spaces.
2. Plumbing & Heating Standards
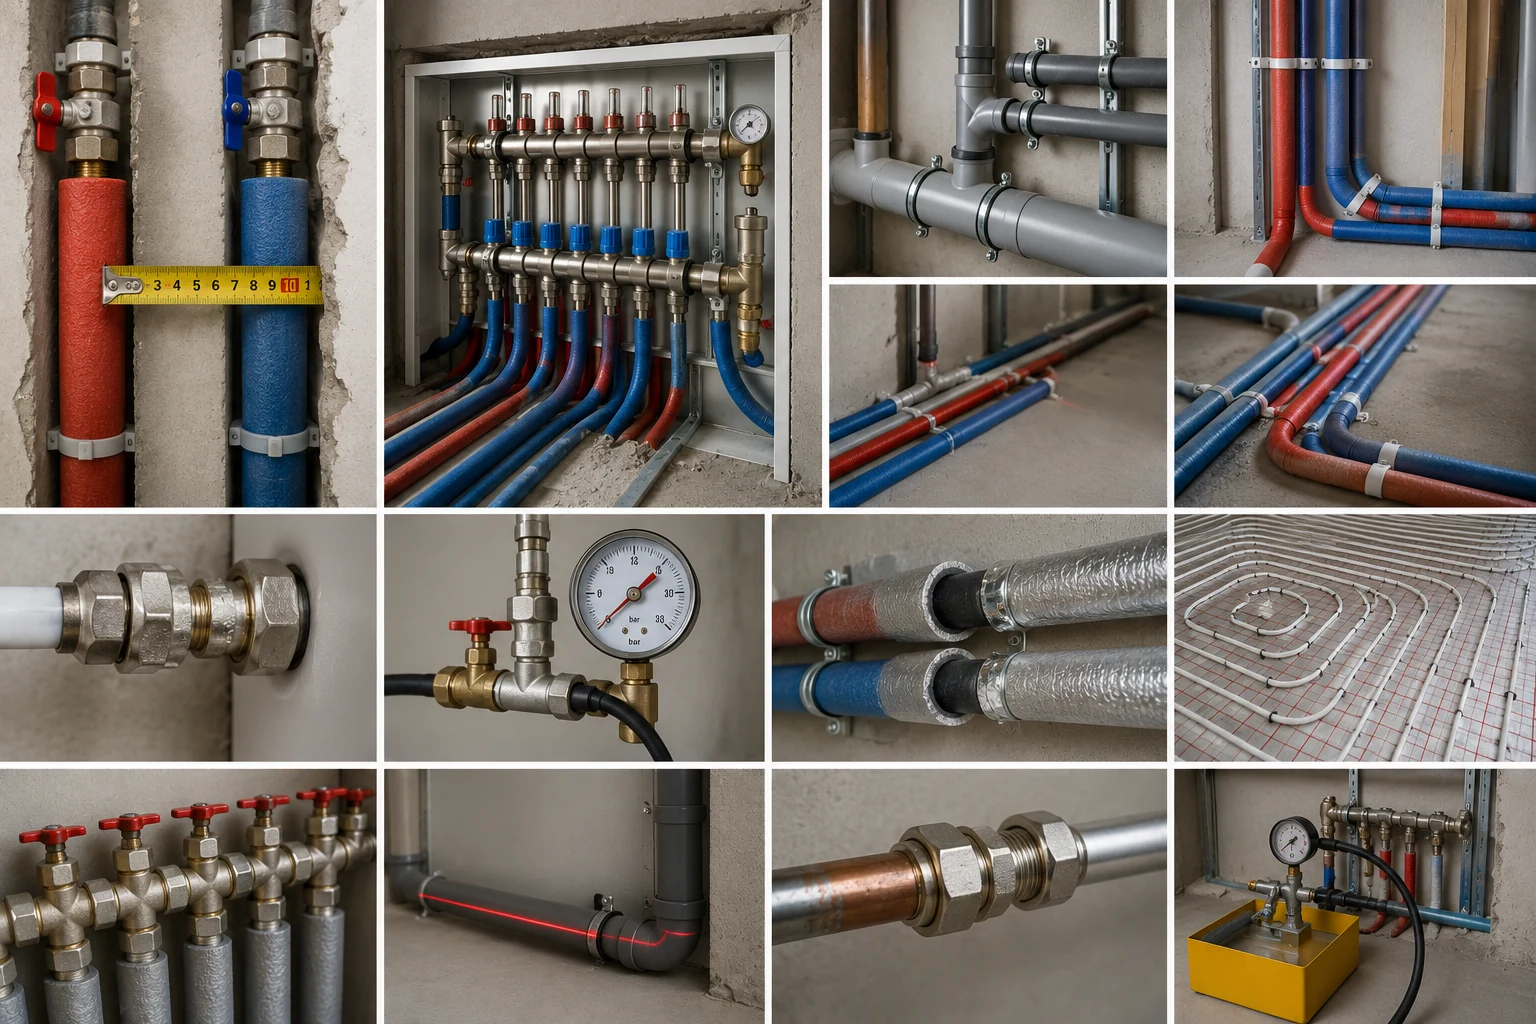
The quality of a plumbing and heating system directly affects the comfort, safety, and long-term performance of a property. Incorrectly installed pipes, improper pipe slopes, or poor-quality fittings often lead to water leaks, inefficient heating, and unnecessary repair costs. For this reason, all plumbing and heating work should be completed in accordance with professional construction standards.
2.1 Basic Plumbing & Heating Standards
- Cold and hot water pipes should be at least 5 cm apart.
- All water pipes must be insulated.
- Pipes should not cross over one another.
- Connections should be made only with high-quality fittings.
- Drainage pipes must have the correct slope to ensure proper water flow.
- The system must be pressure-tested before the walls are closed.
- All shut-off valves should remain easily accessible.
- A manifold (collector) system is recommended for independent control.
- Underfloor heating pipes should be installed with consistent spacing.
- The entire system must be thoroughly inspected after installation.
2.2 Most Common Plumbing & Heating Mistakes
- Installing pipes without insulation.
- Placing hot and cold water pipes too close together.
- Incorrect slope of drainage pipes.
- Using low-quality fittings.
- Skipping the pressure test before finishing the installation.
2.3 Datvale.ge Recommendation
Before starting your plumbing and heating project, use the Plumbing & Heating Calculator to estimate the required materials and project budget. If you are renovating a bathroom, use the Bathroom Renovation Calculator. For bathroom fixtures, sanitary ware, and accessories, explore the Vitra product collection.
3. Tile Installation Standards

Proper tile installation determines not only the appearance of your interior but also its durability. Poor surface preparation, low-quality tile adhesive, or uneven installation can lead to loose tiles, cracks, and moisture problems. For this reason, tile installation should always be carried out according to professional standards.
3.1 Basic Tile Installation Standards
- Walls and floors must be properly leveled before installation begins.
- High-quality tile adhesive must be used.
- Wet areas must be waterproofed before laying tiles.
- Uniform spacing between tiles should be maintained using spacers and leveling clips.
- All corners should be straight, aligned, and symmetrical.
- Cut tiles should be placed in less visible areas whenever possible.
- The tile surface should be perfectly level with no height differences between tiles.
- Grouting should only be carried out after the adhesive has completely cured.
- Wall-to-floor joints should be sealed with silicone.
- After installation, the surface should be thoroughly cleaned of adhesive and grout residue.
3.2 Most Common Tile Installation Mistakes
- Skipping waterproofing.
- Uneven spacing between tiles.
- Using low-quality tile adhesive.
- Height differences between adjacent tiles.
- Applying grout before the adhesive has fully cured.
3.3 Datvale.ge Recommendation
Before starting tile installation in your bathroom, kitchen, or any other space, use the Bathroom Renovation Calculator to estimate the required quantities of tiles, tile adhesive, grout, and other materials. For high-quality ceramic and porcelain tiles, explore the collections from Kerama Marazzi and Merlons.
4. Laminate Flooring Installation Standards
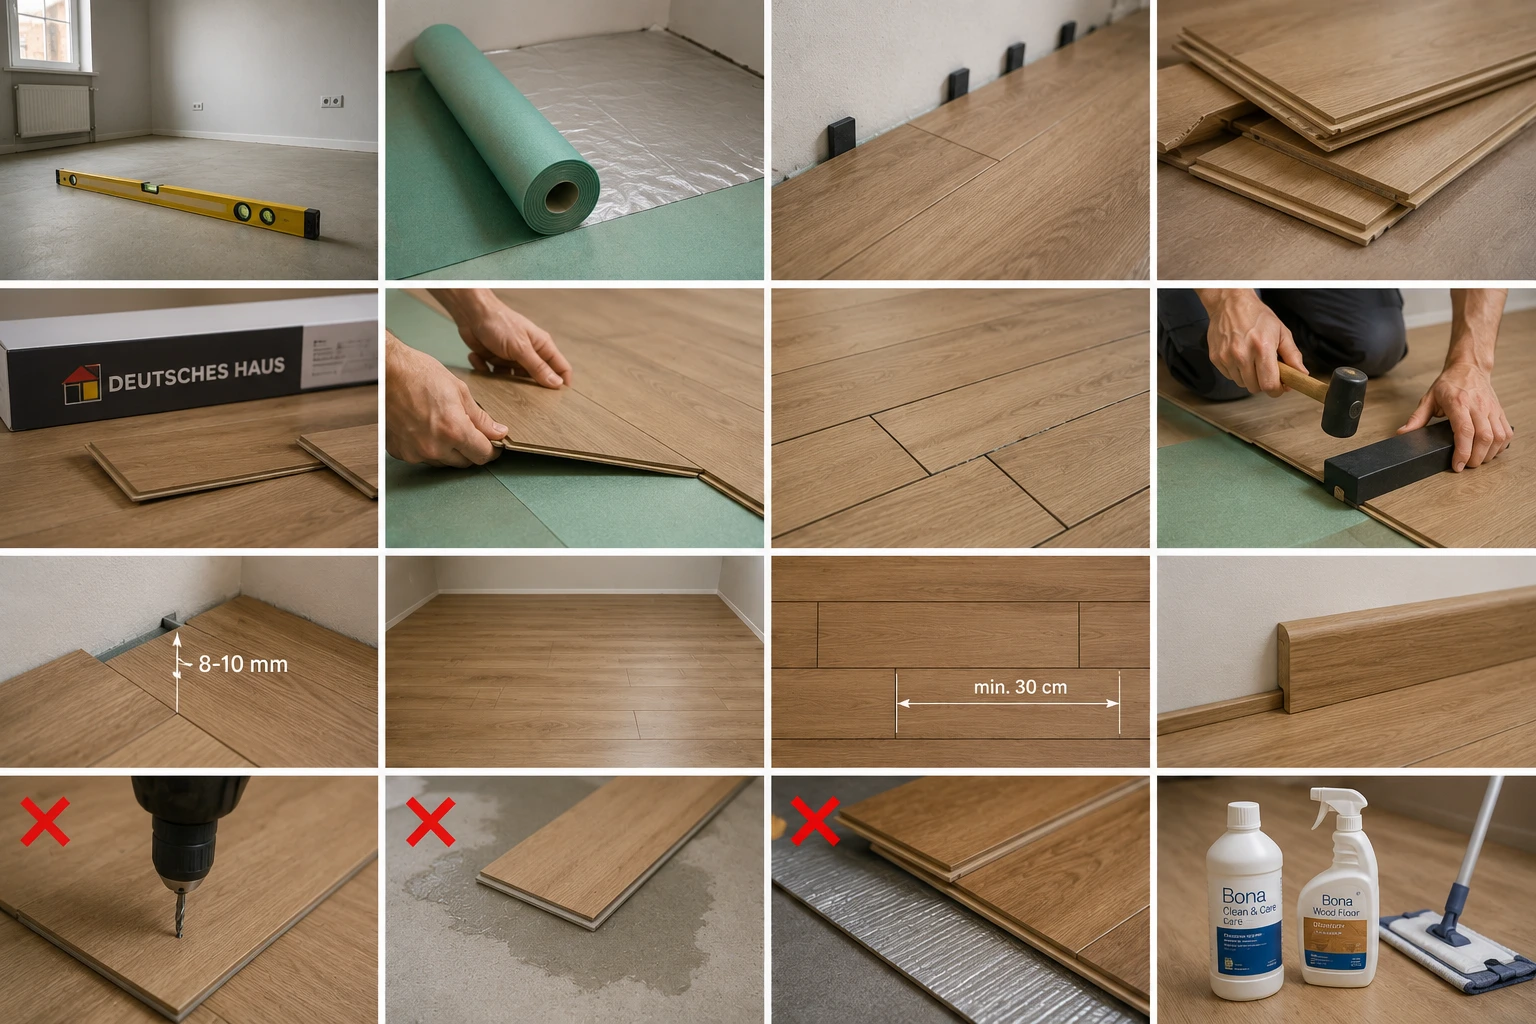
Proper laminate flooring installation ensures durability, comfort, and long-term performance. An uneven subfloor, low-quality underlay, or the absence of expansion gaps can cause the flooring to swell, separate, or become damaged. For this reason, laminate flooring should always be installed according to professional standards.
4.1 Basic Laminate Flooring Installation Standards
- Before installation, the floor must be perfectly level, clean, and dry.
- A high-quality underlay must be used.
- An expansion gap of 8–10 mm must be left around the perimeter of the room.
- The laminate flooring should be stored in the installation room for at least 48 hours to acclimate.
- Installation should begin from a straight reference line with evenly distributed rows.
- Adjacent rows should be staggered by at least 30 cm.
- Laminate flooring must never be fixed to the subfloor with screws or nails.
- Moisture-resistant laminate should be used in wet or humid areas.
- Baseboards should be attached only to the wall, never to the laminate flooring.
- After installation, the floor should be cleaned using appropriate laminate floor care products.
4.2 Most Common Laminate Flooring Mistakes
- Failing to leave expansion gaps.
- Installing laminate on an uneven subfloor.
- Using a low-quality underlay.
- Installing laminate on a damp surface.
- Fixing laminate directly to the floor.
4.3 Datvale.ge Recommendation
Before installing laminate flooring, check that the subfloor is level and dry. For high-quality laminate flooring and accessories, explore the products available from Deutsches Haus. To maintain laminate, parquet, and hardwood floors, use professional floor care products from Bona.
5. Wall Plastering & Painting Standards
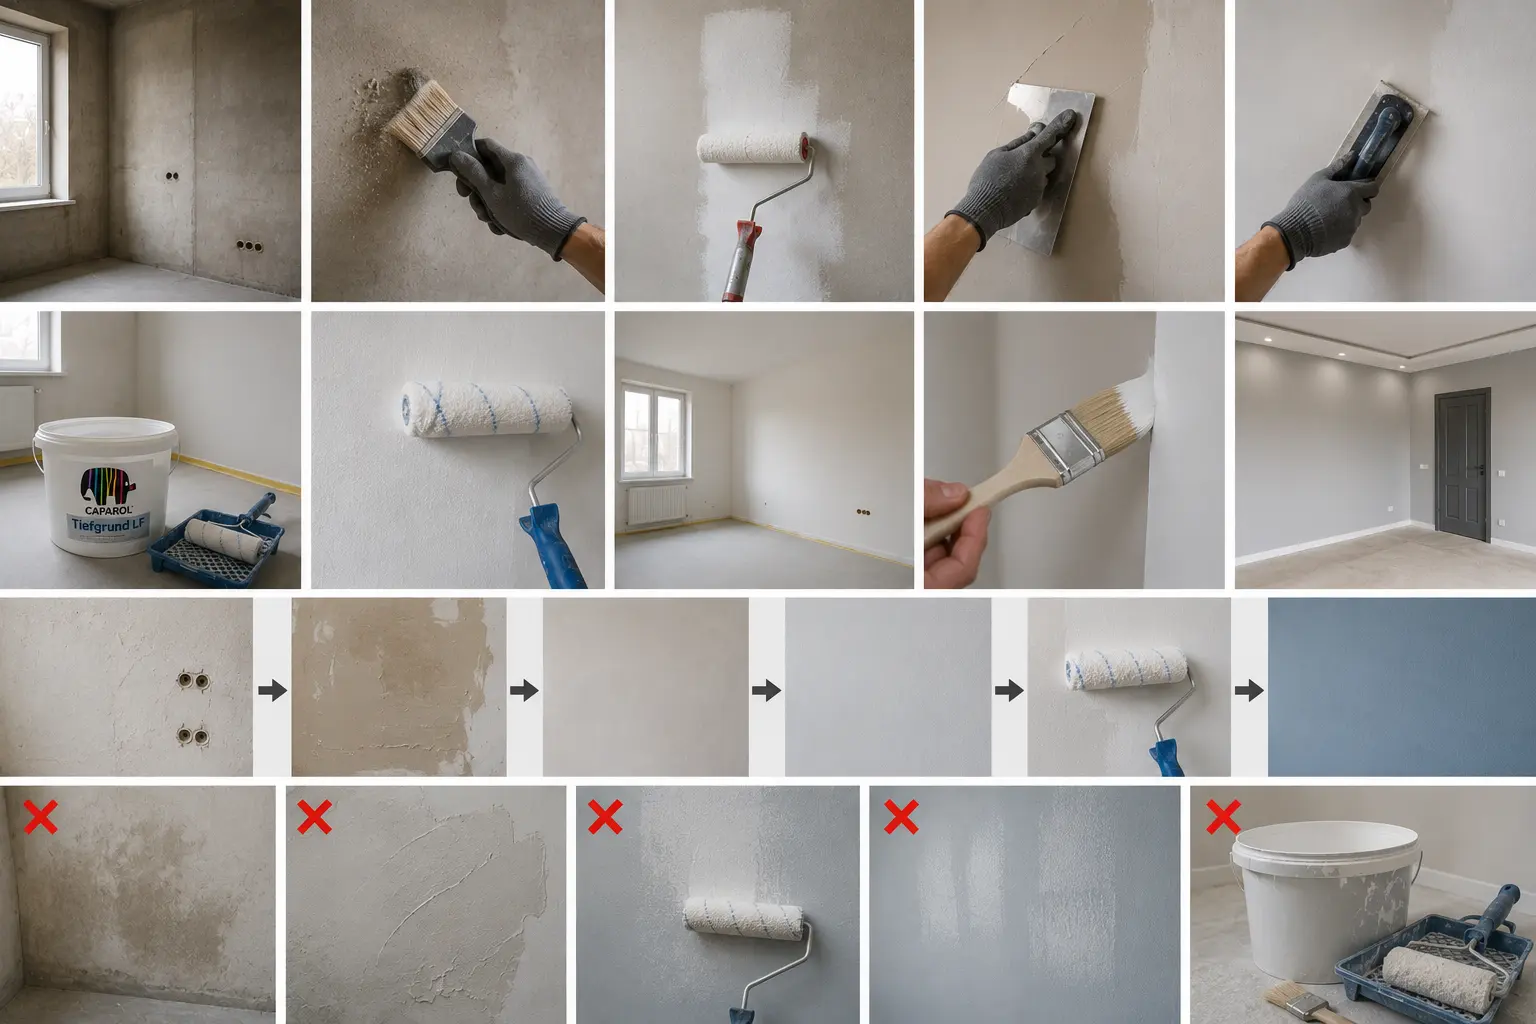
Wall plastering and painting are among the most visible stages of any interior renovation. Poor workmanship can result in uneven surfaces, cracks, stains, and visible imperfections. To achieve a professional finish, the surface must be properly prepared, high-quality materials should be used, and every stage of the process must follow industry standards.
5.1 Basic Wall Plastering & Painting Standards
- The wall must be completely cleaned of dust and debris.
- A primer must be applied before painting.
- The wall should be perfectly leveled and finished with putty.
- The surface should be sanded to achieve a smooth and even finish before painting.
- Paint should be applied in at least two coats.
- The manufacturer's recommended drying time must be observed between coats.
- Painting should be carried out under suitable temperature and humidity conditions.
- High-quality rollers and brushes should be used.
- Corners and joints should be straight, clean, and well-finished.
- After completion, the painted surface should be free of stains, streaks, or color variations.
5.2 Most Common Plastering & Painting Mistakes
- Skipping the primer application.
- Painting on damp walls.
- Poorly finished or uneven putty work.
- Applying only one coat of paint.
- Using low-quality paint.
5.3 Datvale.ge Recommendation
Before starting your painting project, use the Renovation Calculator to estimate the required quantities of paint and other materials. For premium-quality paints and facade systems, explore the products offered by Caparol. For a wide selection of construction and finishing materials, visit NOVA.
6. Ceiling Installation Standards
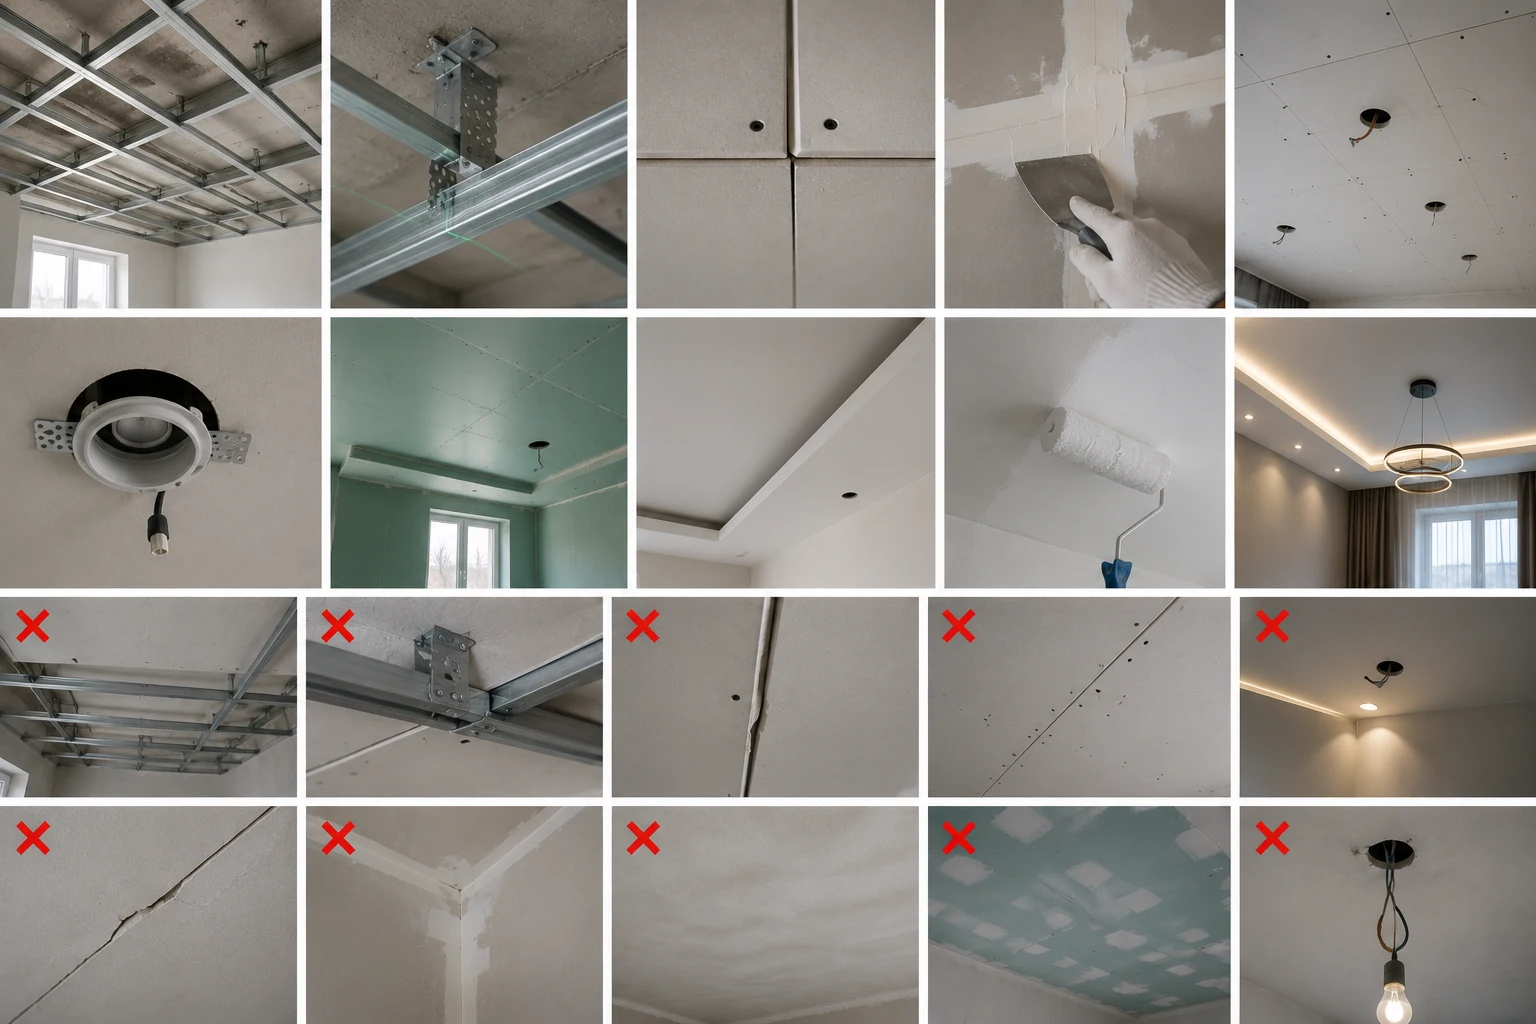
Ceiling installation has a significant impact on the appearance of an interior, as well as its lighting, acoustics, and overall comfort. Whether installing drywall, stretch ceilings, or other ceiling systems, all work should be carried out according to professional standards to prevent cracks, deformation, and uneven surfaces.
6.1 Basic Ceiling Installation Standards
- The ceiling frame must be installed on a perfectly level surface.
- All metal profiles should be securely fixed using appropriate fasteners.
- Expansion gaps should be maintained between drywall panels.
- All joints must be reinforced with joint tape and finished with joint compound.
- Lighting fixture locations should be planned before installation.
- The ceiling structure must be capable of supporting lighting fixtures and other installed elements.
- Moisture-resistant drywall should be used in humid areas.
- Before painting, the surface must be fully leveled and primed.
- The finished ceiling should be free of cracks, waves, or visible joint lines.
- After installation, all lighting fixtures and built-in components should be thoroughly tested.
6.2 Most Common Ceiling Installation Mistakes
- Improperly installed ceiling framing.
- Using low-quality metal profiles.
- Failing to reinforce drywall joints.
- Poor planning of lighting fixture locations.
- Painting without applying primer.
6.3 Datvale.ge Recommendation
Before starting your ceiling installation project, use the Renovation Calculator to estimate the cost of materials and labor. To choose modern lighting fixtures and ceiling lighting solutions, visit New Light, where you'll find a wide range of lighting products for residential and commercial spaces.
7. Furniture Manufacturing Standards
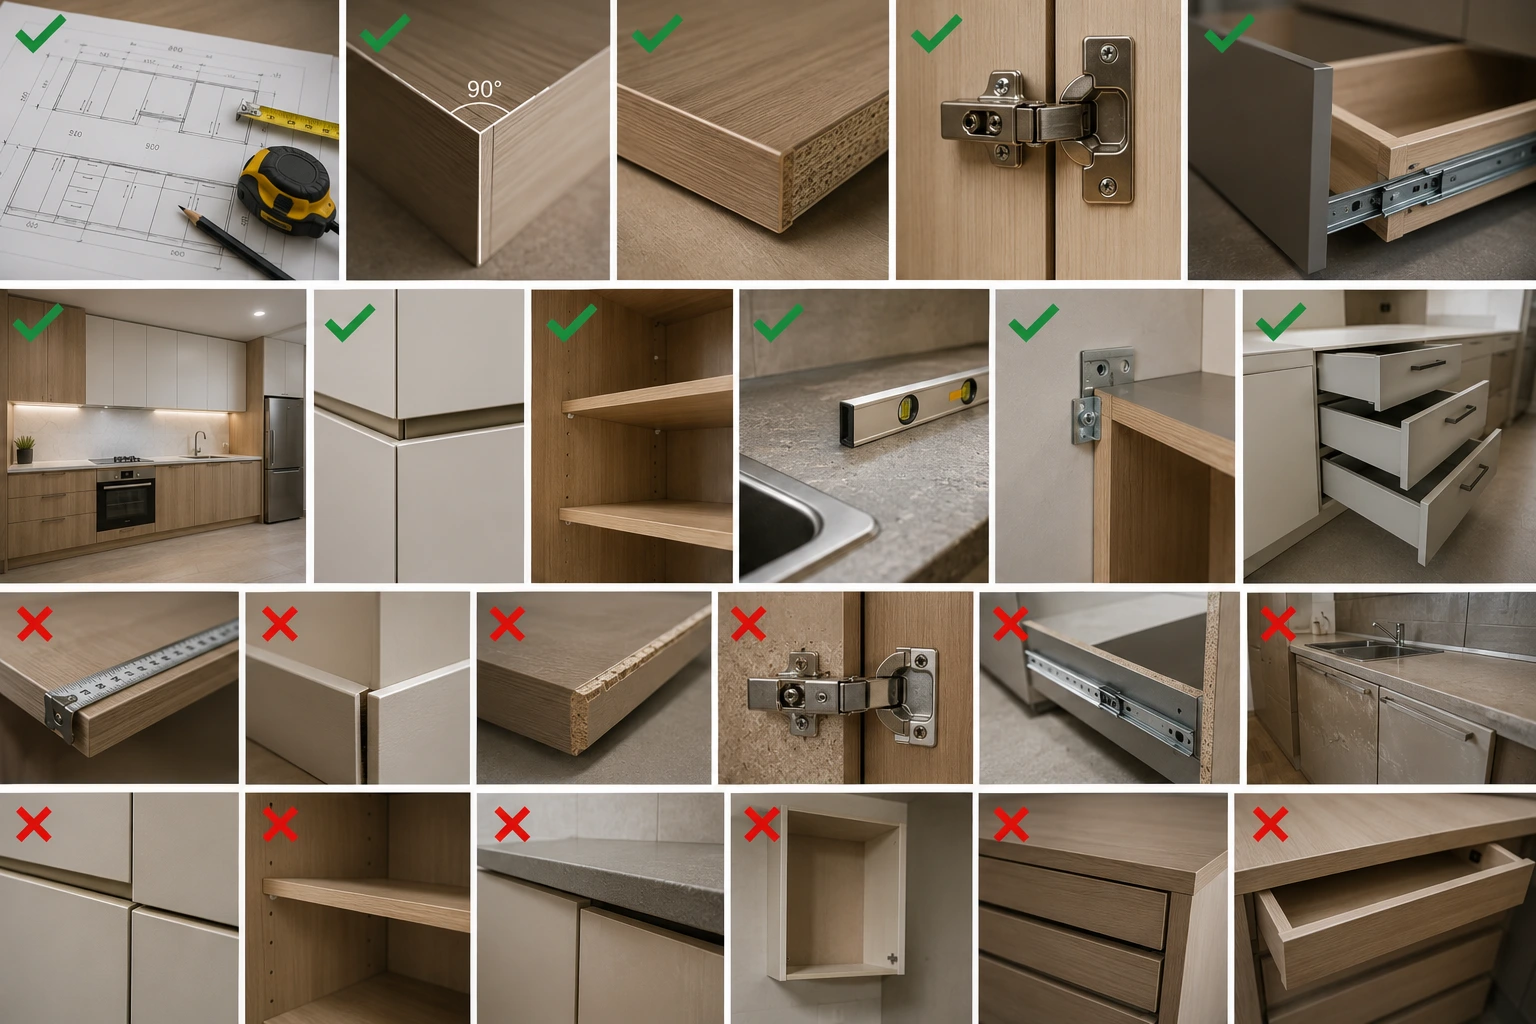
When manufacturing custom furniture, not only the design matters, but also the quality of materials, precise measurements, proper construction, and the use of high-quality hardware. Following professional standards ensures durability, safety, and everyday comfort for many years.
7.1 Basic Furniture Manufacturing Standards
- All measurements should be verified at least twice before production begins.
- Cabinets and furniture frames must be assembled with precise 90° angles.
- All exposed edges of laminated boards should be edge-banded.
- High-quality hinges, drawer slides, and other hardware should be used.
- Moisture-resistant materials and accessories are essential for kitchen cabinets.
- The gaps between cabinet doors and kitchen fronts should be even and consistent.
- Shelves should be properly positioned and designed to support the intended load.
- Kitchen countertops must be perfectly level.
- Installed furniture should be securely fixed to the wall wherever required.
- Before handover, all doors, drawers, and hardware should be tested to ensure smooth operation.
7.2 Most Common Furniture Manufacturing Mistakes
- Incorrect measurements.
- Using low-quality hardware.
- Unfinished or exposed panel edges.
- Uneven spacing between doors and drawers.
- Furniture that is not securely fixed to the wall.
7.3 Datvale.ge Recommendation
Before ordering custom furniture, use the Furniture Calculator to estimate material quantities and project costs. To visualize your interior before production, use the Design Calculator. For premium furniture lighting solutions and accessories, explore the collection from New Light Furniture.